
Tip: To learn about age restriction laws in all 50 states, check out our website: www.usidlaws.com
A rule decides who passes your age check. Build your rules before you set up a website embed or an in-person QR code, because an event has to point at one.
Organizations configure these rules in the ChainIT Portal under Configuration > Business Rules > My Age App. Individuals use the My Age App mobile app to complete age verification. The ChainIT Portal is where your organization defines the rules that are evaluated during that process.
Open My Age App Business Rules
Go to admin-react.chainit.online and sign in to the Business Portal.
There is no password. The page shows a QR code, and scanning it with the ChainIT ID app signs you in. If you do not have the app yet, your phone camera will take you to the app store.
Then:
- Select Configuration from the left navigation.
- Select Business Rules.
- Select My Age App.
-png.png?width=670&height=377&name=ChatGPT%20Image%20Aug%2020%2c%202026%2c%2003_59_03%20PM%20(1)-png.png)
The My Age App folder contains your organization’s rule folders. The Template folder is provided by default and contains example rules that you can reference when creating your own configuration.
Review the rule templates
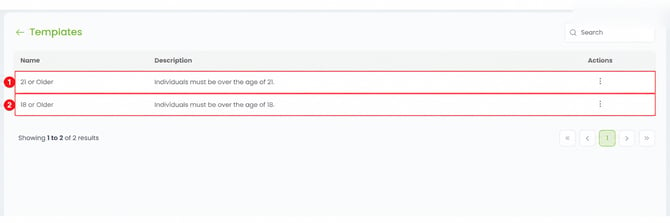
Select the Template folder to view the available example rules.
The default templates include:
- 21 or Older
- 18 or Older
You can use these examples to understand how a basic age rule is structured before creating your own rules.
Create a folder for your rules
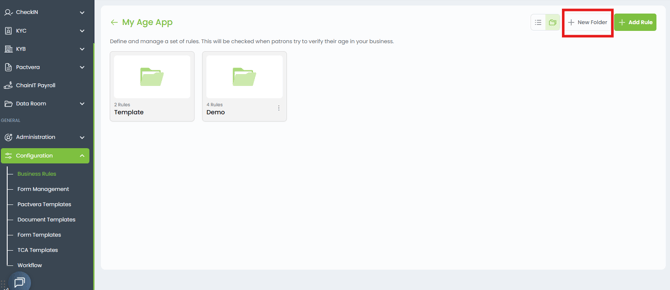
Before creating your own rules, create a folder to organize them.
- From My Age App, select New Folder.
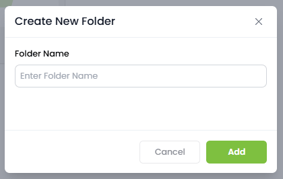
- Enter a name that identifies the group of rules.
- Save the folder.
For example, you could create folders for a specific website, location, event, or other use case where the same verification rules will be used.
The Template folder remains available separately and cannot be deleted.
Add a rule
Open the folder where you want to create the rule, then select Add Rule.
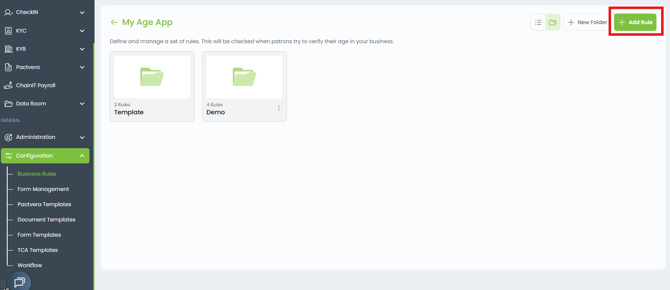
On the Add Rule page:
- Confirm the correct Folder.
- Enter a Rule name.
- Optionally enter a Rule description.
- Select Add Condition (L1) to define the first condition.
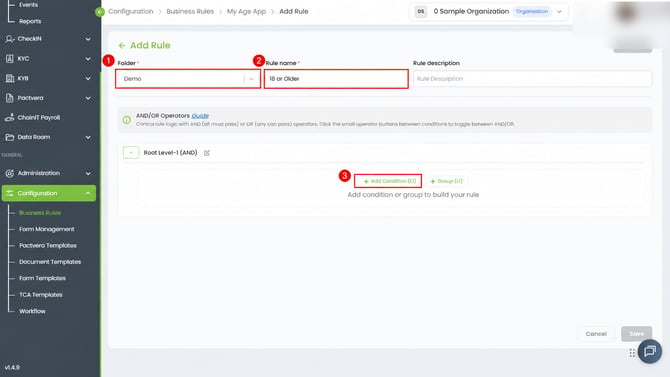
A rule can contain one condition or multiple conditions. You can also create groups when more complex logic is required.
Configure a condition
Each condition contains five configuration fields:
Context
Identifies the type of data being evaluated. For My Age App rules, select IVDT-ATTENDEE.
Attribute
Identifies the information that the rule evaluates. The current My Age App configuration provides Age, BeingID Level, and Current State.
Operator
Defines how the attribute is compared with the configured value. The available options depend on the selected attribute and can include comparisons such as Equal To, Greater Than, Greater Than or Equal To, Less Than, and existence checks.
Comparison Type
Defines how the comparison value is supplied. For the examples in this guide, select Static Value to compare the individual’s attribute with a value configured directly in the rule.
Value
Defines the value against which the selected attribute is evaluated.
Configure an age requirement
To create a basic minimum-age rule:
- Set Context to IVDT-ATTENDEE.
- Set Attribute to Age.
- Select Greater Than or Equal To as the Operator.
- Set Comparison Type to Static Value.
- Select the minimum permitted age as the Value.
For example, a rule requiring an individual to be at least 18 would be configured as:
Age ≥ 18
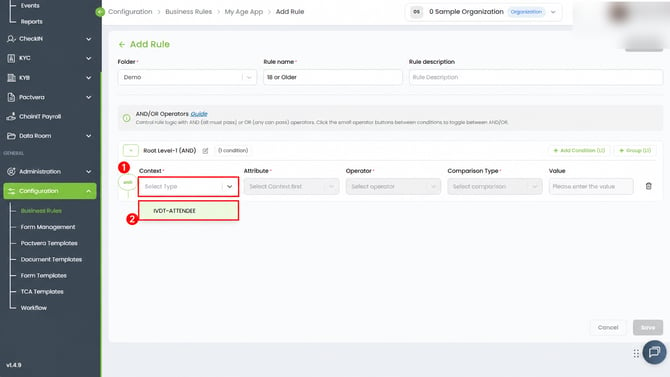
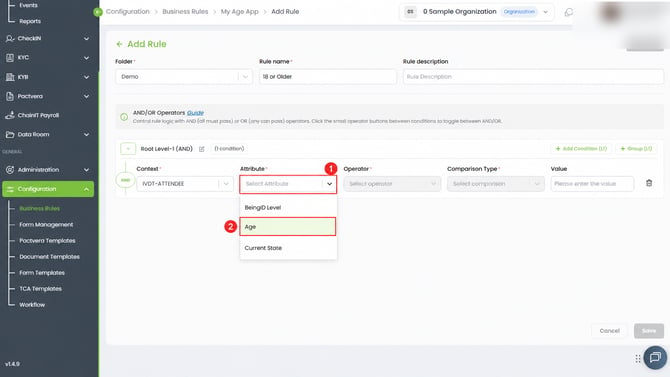
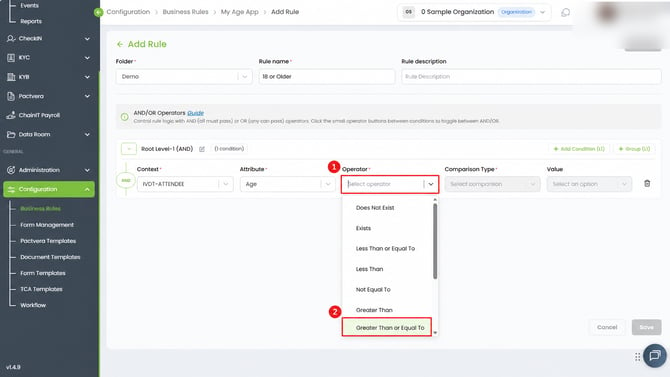
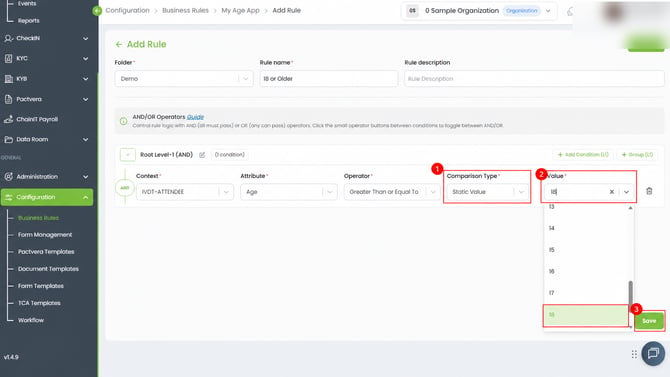
Select Save when the rule is complete.
Available My Age App attributes
The current configuration supports three attendee attributes.
Age
Age allows you to set the minimum or other age requirement that an individual must satisfy.
Common examples include:
Age Greater Than or Equal To 18
or
Age Greater Than or Equal To 21
Use the operator that accurately represents your organization’s requirement. The evaluation is based on the configured condition, not the rule name.
BeingID Level
BeingID Level allows you to require a minimum identity-assurance level in addition to an age requirement.
BeingID is ChainIT’s structured identity assurance classification. It reflects the depth and strength of completed identity verification. It does not grant authority or permission.
To configure a minimum BeingID requirement:
- Select IVDT-ATTENDEE as the Context.
- Select BeingID Level as the Attribute.
- Select the appropriate Operator, such as Greater Than or Equal To.
- Select Static Value.
- Select the required BeingID level.
The current rule builder presents BeingID values as Level 1 through Level 10.
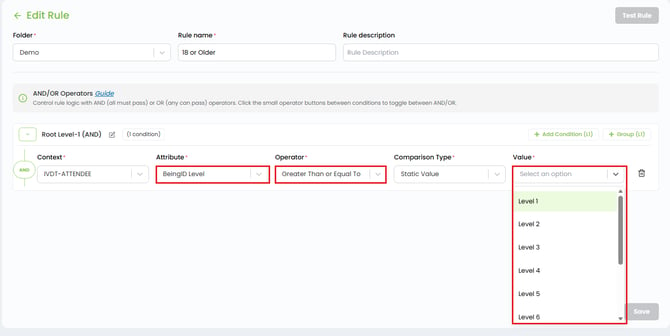
For example:
BeingID Level Greater Than or Equal To Level 5
BeingID should be treated as an identity-verification input to the rule. The Business Rules Engine evaluates the configured conditions to produce the eligibility result.
Current State
Current State allows the rule to evaluate the attendee’s current state value.
Location is optional. A rule only considers where someone is if you add a Current State condition. Leave it out and visitors are judged on age and BeingID level alone, wherever they are. Add one and it becomes a requirement like any other, so a visitor outside the states you name will fail it. Name every state you serve, group them with OR when you need several, or give each region its own event and rule when the age threshold differs.
To configure a state condition:
- Select IVDT-ATTENDEE as the Context.
- Select Current State as the Attribute.
- Select an Operator such as Equal To.
- Select Static Value.
- Select the applicable state.
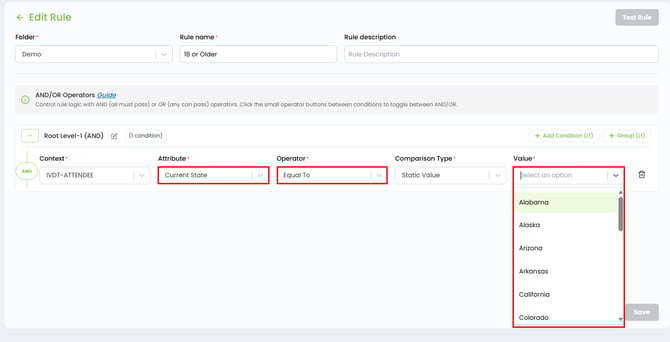
For example:
Current State Equal To California
This can be combined with an age condition when your organization needs different requirements for different states.
Age thresholds are set state by state and are not the same everywhere. usidlaws.com lists the requirements for all fifty.
Combine multiple conditions
Select Add Condition (L1) when a rule needs to evaluate more than one requirement.
My Age App rules support AND and OR logic.
AND means all connected conditions must pass.
For example:
Age ≥ 21
AND
Current State = California
OR means any connected condition can satisfy that portion of the rule.
You can toggle the operator between conditions to change the logic from AND to OR.
For more complex requirements, select Group (L1) to organize conditions into nested logical groups.
Review an existing rule
Open a folder to view its rules.
Each rule displays its:
- Name
- Description
- Status
- Available actions
Use the three-dot Actions menu to:
- Edit the rule.
- View the rule.
- Print the rule.
- Delete the rule.
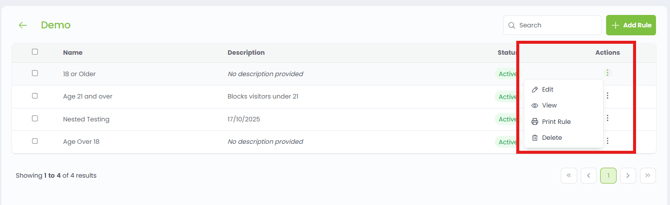
Select View to inspect the rule without changing its configuration.
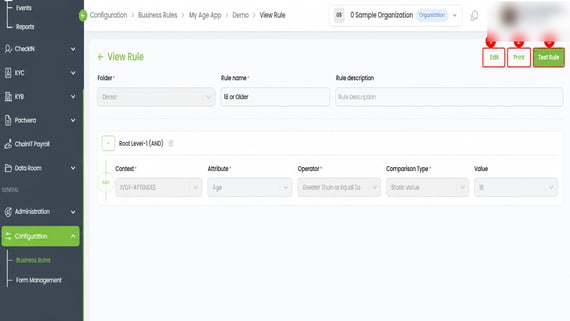
From the View Rule page, you can select:
- Edit to update the rule.
- Print to generate a printable representation of the rule.
- Test Rule to evaluate the rule using sample values.
Test a rule before using it
Testing allows you to confirm that the rule produces the expected result for different attribute values.
From the View Rule page, select Test Rule.
The Test Rule page displays each attribute that requires a test value.
Select a value for the attribute, then select Validate.
For an age rule, for example, you can test an age below the threshold to confirm that the rule fails.
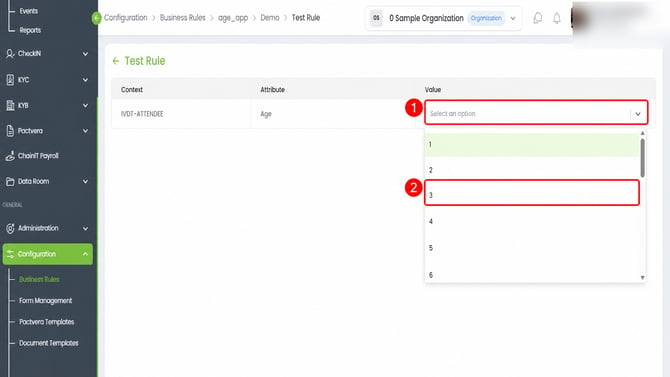
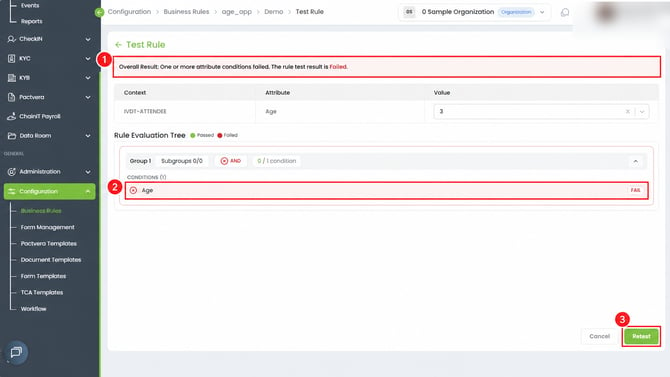
A failed test displays:
- An overall Failed result.
- The condition or conditions that failed.
- A FAIL indicator for the applicable condition.
A successful test displays:
- An overall Passed result.
- The conditions that passed.
- A PASS indicator for the applicable condition.
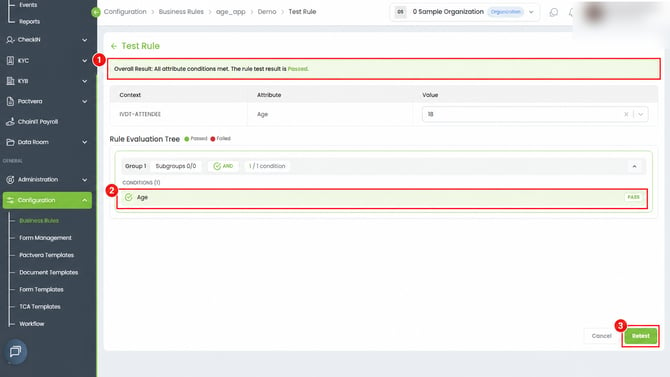
Select Retest to try another value.
Testing does not change the rule. It allows you to validate the configured logic before relying on it in your My Age App verification flow.
Edit an existing rule
To update a rule:
- Open the applicable folder.
- Open the three-dot Actions menu.
- Select Edit.
- Update the rule conditions.
- Select Save.
The Edit Rule page uses the same condition structure as Add Rule.
You can change the Attribute to configure Age, BeingID Level, or Current State requirements.
When modifying an active rule, review and test the updated configuration before relying on it for age verification.
A rule already attached to an event cannot be edited. The portal shows an Action Not Allowed message. Swap the event to another rule first with Change Rule, or create a new rule and attach that instead.
A note on rule priority
Earlier versions asked you to arrange rules by priority. That no longer applies.
An event holds exactly one rule. The only control on a saved event is Change Rule, which swaps it, so there is no ordering to arrange. Logic that used to be spread across several ranked rules now lives inside a single rule, expressed with AND and OR groups.
If you need different logic for different sites or venues, create a separate event for each and give each one its own rule.
Example configurations
A simple 18+ rule:
Age ≥ 18
A rule that requires both age and identity assurance:
Age ≥ 21
AND
BeingID Level ≥ [required level]
A state-specific rule:
Current State = [State]
AND
Age ≥ [required age]
For more complex requirements, use additional conditions and groups to represent the policy you need to enforce.
What happens next
A rule on its own does nothing. To use it, create an event and attach the rule to it. See Create an Age App event.
Your organization is responsible for determining the age-verification and identity-assurance requirements that apply to its business and jurisdictions. My Age App and the Business Rules Engine evaluate the conditions your organization configures; they do not independently determine the applicable legal or regulatory requirement.