
This guide explains how to create a Pactvera Agreement, add parties, configure documents and forms, assign required actions, and send the agreement for completion.
A Pactvera Agreement is intended for workflows centered on:
- Signing or reviewing documents
- Completing forms
- Collecting approvals or acknowledgments
- Sharing a completed agreement with designated recipients
If the agreement also includes a payment or the exchange of a product, service, entitlement, or other item of value, create a Pactvera Transaction instead.
See Transactions: How to Create a Pactvera Transaction for instructions.
Step 1 — Create the Pactvera
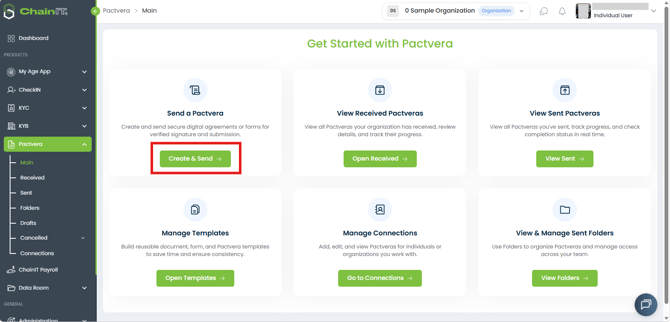
From the "Get Started with Pactvera" / "Main" page:
- Click Create & Send.
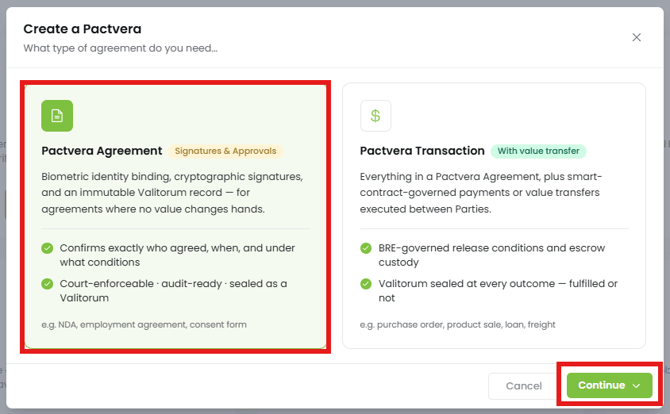
- Select Pactvera Agreement and click Continue.
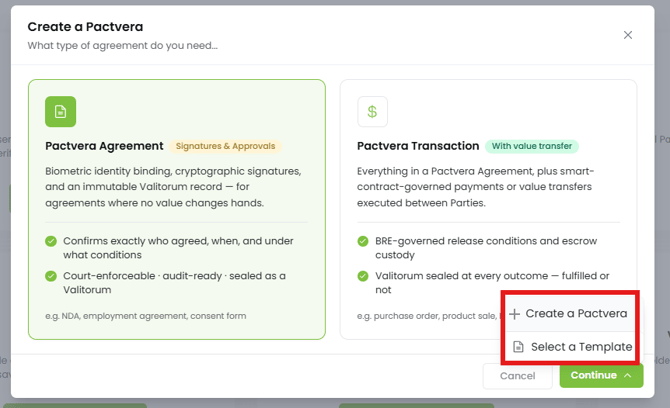
- Choose to create a new agreement from scratch or use a template if you have one.
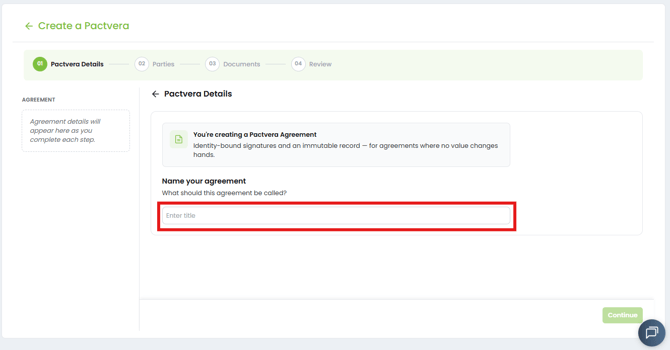
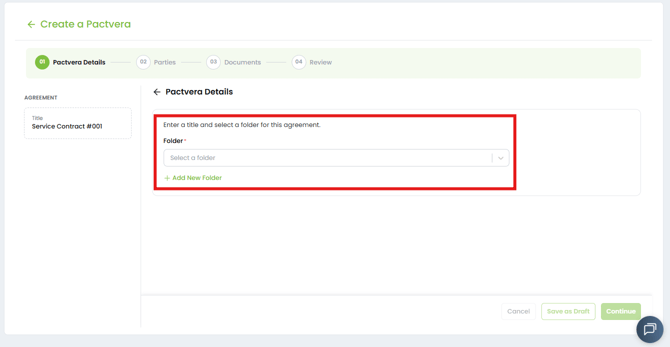
- Next, enter a name for the agreement. Make sure to use a name that will be recognizable to all parties.
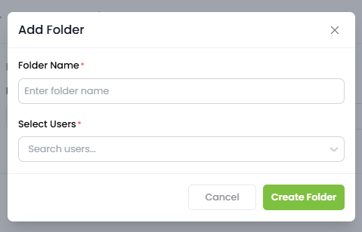
- Select a folder to store the agreement or create a new one by clicking "Add New Folder".
Step 2 — Add the Parties
Parties are the individuals or organizations participating in the Pactvera. They are defined at the agreement level and are then referenced throughout its documents and forms.
Parties may be required to:
- Sign a document
- View or review a document
- Complete a form
There are two types of Parties that can be added to a Pactvera.
-
Individual
- An individual signs on their own behalf once identity requirements are met.
- Their signature legally binds them as an individual, not on behalf of an organization.
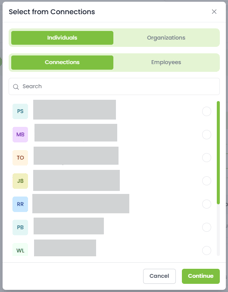
- Can be selected from existing Connections or Employees or invited via email address or mobile number during Pactvera creation.
- All individuals are required to onboard to ChainIT ID with a valid ID document such as a Driver's License or other state-issued ID card, passport, or other valid government-issued international ID document.
-
Organization
-
An individual signs on behalf of the organization in a legal capacity.
-
The organization is legally bound to the agreement, not just the individual who signs.
-
Can be selected from existing Connections or invited via tax ID or email during Pactvera creation.
-
Internal signers are assigned by that organization after receipt — the sender cannot assign signers on behalf of another organization.
-
Important Note: An organization party receives the Pactvera, then internally assigns which of its authorized employees will execute each required action, governed by their own authority structure. Click here to learn more about Organizational Authority on ChainIT.
CC Recipients
CC recipients receive notice-only access and copies of the completed Pactvera but are not parties and cannot be assigned any actions on documents or forms.
Adding Parties
To add parties to the agreement, you can either:
- Select from your existing Connections (users or organizations you've already sent Pactveras to)
- Select an employee from within your organization
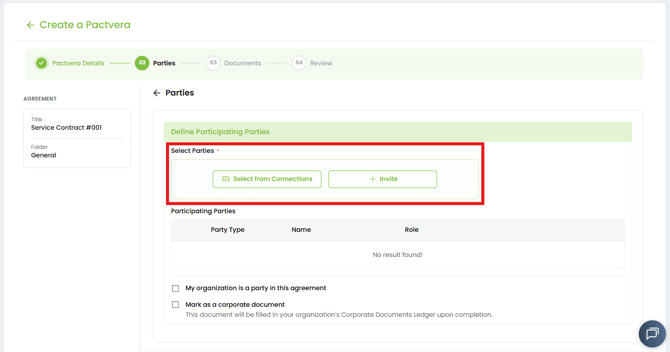
- Or invite a new organization or individual party.
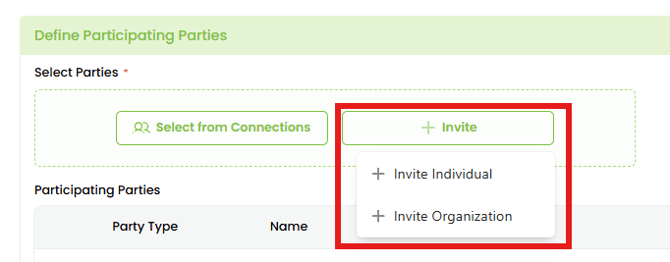
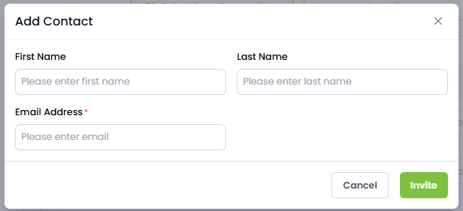
- To invite an individual, only the email address is required.
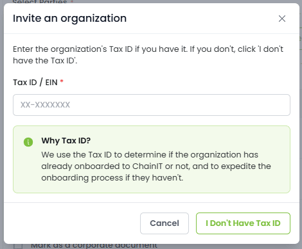
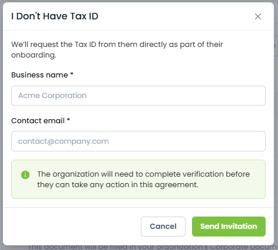
- To invite a new organization, either enter the Tax ID number, or invite them by email address if you don't have the Tax ID Number.
-
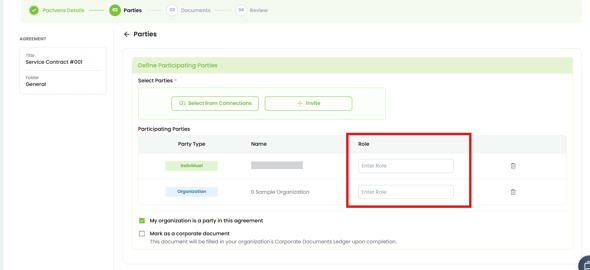
(Optional) Add role labels (e.g., Buyer, Seller) to help organize parties.
- If your organization is one of the parties in the agreement, check this box to add it to the table.
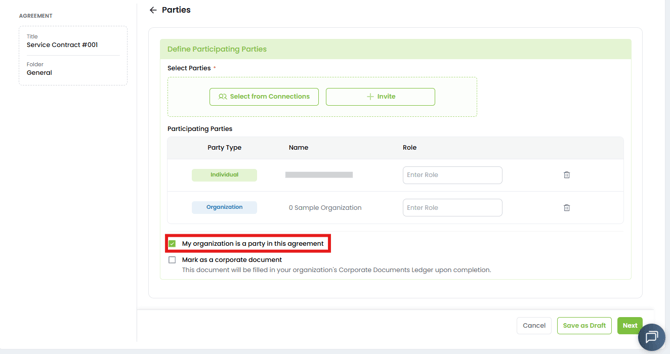
Once added, this party list defines who can be assigned actions later in the Pactvera.
Click here to learn more about Parties and Actions in Pactvera.
Step 3 — Add Documents and Forms
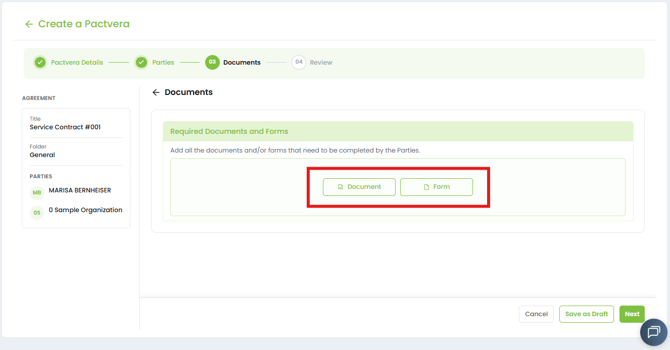
Add the materials that the parties must complete or review.
You can:
- Upload a document
- Select a document template
- Add a form
- Select a form template
Documents and forms are configured separately, but they reference the same agreement-level party list.
A Pactvera Agreement may include:
- Documents only
- Forms only
- A combination of documents and forms
Click here for an in-depth look at how to configure documents in a Pactvera.
Click here for the full guide to creating forms in a Pactvera.
Step 4 — Review and Send
Before sending, review:
- The Pactvera name and folder
- All parties and role labels
- Documents and forms
- Assigned actions
- Required document fields
- Copy recipients
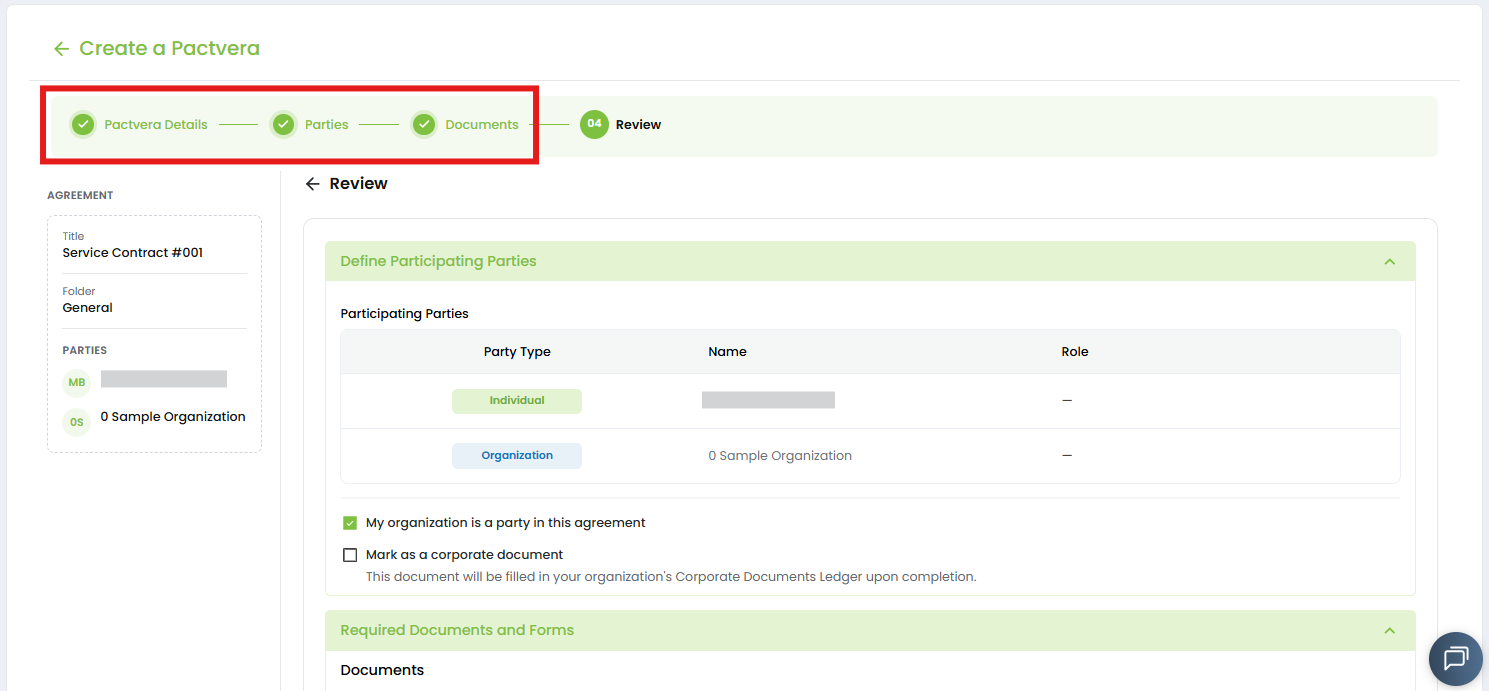
You can go back and make edits by selecting the step in the header.
Click Send when the agreement is ready.
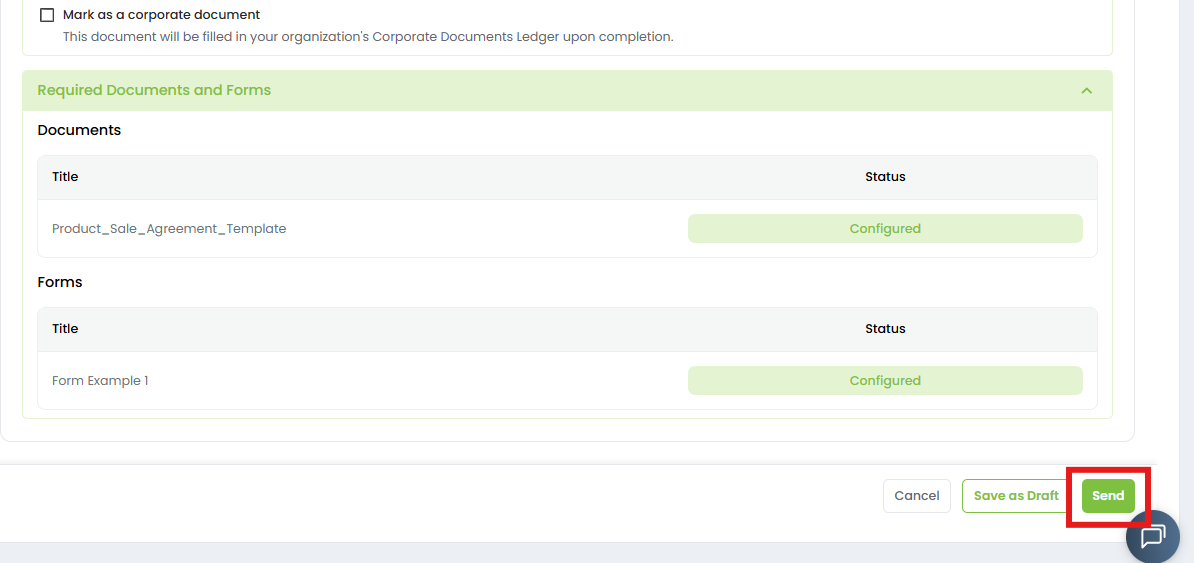
Parties will receive an email notification with a link to access the Pactvera. They may be required to onboard to or authenticate with ChainIT ID before completing their assigned actions.
Recipients who only receive a copy are notified after the Pactvera is completed.
Step 5 — Track Progress
After sending, you can monitor the Pactvera from the Sent area.
You can:
- See which parties have completed their actions
- Identify remaining actions
- Review the overall agreement status
- Follow up with participants when necessary
For a Pactvera Agreement, completion is based on the required document and form actions configured in the agreement.
Pactvera Transactions follow a broader completion model. A transaction may remain active after documents are signed if payment, funding, inspection, release, payout, or transfer actions are still outstanding.
What Happens After Completion?
When all required actions are complete:
- The Pactvera is finalized.
- A final version of the agreement is generated.
- Completed actions are recorded with their associated timestamps and execution details.
- Parties and copy recipients receive access according to their permissions.
The final record shows:
- Who completed each action
- What action was completed
- When it occurred
- Where it occurred, when captured
- Which documents and forms were included
The completed agreement becomes part of the Pactvera’s final execution record.
How Agreements Relate to Pactvera Transactions
Pactvera Agreements and Pactvera Transactions use the same foundational concepts:
- Agreement-level parties
- Documents and forms
- Assigned participant actions
- Verified identity
- Organizational authority
- A final execution record
A Pactvera Transaction adds an exchange-of-value layer that may include:
- An item of value
- A payment obligation
- Funding
- Release conditions
- Release authorization
- Transfer or disbursement
Funding, payment fulfillment, release, and final transfer are distinct transaction states and may each be required before a Pactvera Transaction is complete.
Use the Pactvera Agreement workflow when no transaction-specific value exchange needs to be managed.
Use the Pactvera Transaction workflow when Pactvera must coordinate both the agreement and the execution of value.
Summary
Creating and sending a Pactvera Agreement allows you to:
- Define all parties at the agreement level
- Add documents and forms
- Assign signatures, reviews, submissions, and other actions
- Ensure the appropriate individuals complete each step
- Send the agreement securely
- Track progress and completion
- Maintain a clear and verifiable execution record
For agreements involving payments, products, services, entitlements, or conditional value release, use a Pactvera Transaction instead.