
Age App checks a visitor's age before they reach your site or your counter. This guide covers the whole setup, from creating your organization account to your first report.
There are four steps. Budget about an hour if your organization account already exists.
Before you start
Have these ready. Verification stalls without them.
- Your organization's tax ID.
- Your organization's registered name.
- Your organization's state of incorporation.
- The ChainIT ID app installed on a phone.
The Business Portal has no passwords, so signing in means scanning a QR code with the ChainIT ID app.
Step 1: set up your organization account
Go to chainitorg.com and create your organization's account. This is a separate site from the Business Portal, and it is where verification happens.
The flow covers authorized representative attestation, your organization profile, a one-time setup fee, payment, Secretary of State verification, and a face scan to set up biometric sign-in.
See the full walkthrough in How do I set up my organization account with ChainIT.
Once your organization is verified you can sign in to the Business Portal at admin-react.chainit.online. The page shows a QR code. Scan it with the ChainIT ID app and the page signs you in.
Invite your colleagues
Anyone else who needs portal access gets their own credentials rather than sharing yours.
- Open Administration, then User Management.
- Click Invite Admin.
- Choose Existing User or New User.
Pending invitations are listed under View Pending Invites. Each person is assigned roles, and role changes go through an approval step.
Step 2: build your age rules
A rule decides who gets through. You build it from conditions, such as an age of at least 21, and you can combine conditions with AND and OR.
- In the Business Portal, open Configuration, then Business Rules.
- Open the My Age App card.
- Rules are kept in folders, so open a folder or create one.
- Click Add Rule.
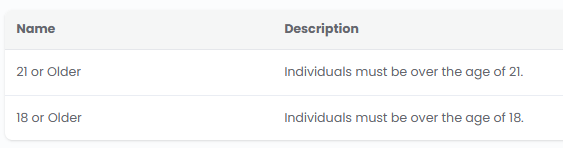
Full instructions are in Configure your age rules.
Step 3: create an event
An event connects your rule to a place. It sets whether you are checking ages on a website or in person, over what dates, and using which rule.
Nothing works without one. You cannot embed age verification or show a QR code at your door until an event exists.
- Open Age App, then Events.
- Click Add Event.
- Choose Embed for a website or In-Person for a physical location.
Full instructions are in Create an Age App event.
Step 4: go live
For a website, copy the embed script from your event and paste it into your site. See Embed age verification on your website.
For a physical location, display the event's QR code on a screen and have customers scan it. See Use in-person age verification.
Checking your reports
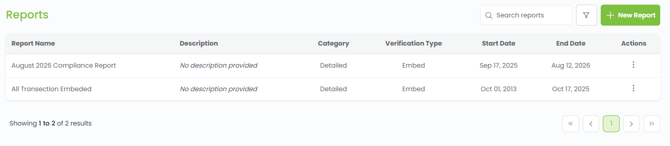
Once visitors start verifying, open Age App, then Reports, to generate a report over any date range and export it. That export is what you hand to a regulator.
If you get stuck
Contact support at any point. Age restriction laws vary by state, and usidlaws.com covers the rules for all fifty.
Your organization is responsible for determining the age verification requirements that apply to its business, products, services, and jurisdictions. Age App provides the tools to configure and document those requirements.